Off the shelf parts
4 x 1/2" ID sealed roller bearings
4 x 1/2" ID needle roller thrust bearings
4 x 1/2" ID collar clamps
4 x 3ft ACME 1/2-10 lead screws that will be trimmed to fit
24 x 1/2" SHCS
24 x T-Slot economy nuts
1 x NEMA 23 stepper motor
Fabricated Parts
4 x End Plates made from 0.25" aluminum plate
4 x Bearing blocks made from 0.375" plexiglass (just what I happened to have on hand)
4 x Motor Mounts made from 0.25" aluminum plate
2 x Low Profile Delrin 1/2-10 ACME Nuts made from 0.75" black Delrin
The material for the plates was purchased from the 8020 ebay store. The dimensions for the end plates are:
 |
| End Plate Dimensions |
 |
| End Plate 3D isometric view |
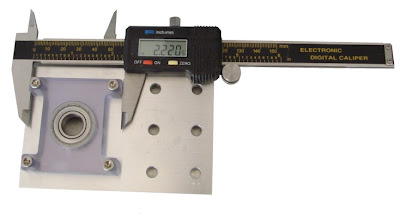
As simple as these plates are, they need to be reasonably precisely made in order for everything to fit properly during assembly. These were all machined on the micro mill which reduces some of the tedium of making the same part 4 times. The 8-32 holes were tapped by hand. The end plates support both ends of the lead screw and are attached to the 8020 extrusions using 6 x 1/4-20x0.5 SHCS.
The bearing blocks provide axial alignment for the lead screw. They were made from 0.375" acrylic sheet as that is what was on hand at the time. They have held up well for 2 years now but aluminum would have been the "pro" choice. Eventually 7 of these blocks will be needed so they might as well all be made at the same time. The indented sides serve no purpose and can be eliminated to reduce the amount of fabrication work.
 |
| Bearing Block Dimensions |
 |
| Bearing Block 3D isometric view |
 |
| End plate, bearing block and rotary bearing before assembly |
 |
| End plate and bearing block after assembly |
 |
| NEMA 23 Motor Standoff Dimensions |
 |
| NEMA 23 Motor Standoff 3D isometric view |
The last parts were the Delrin nuts. Delrin is a self lubricating engineering plastic that is commonly used for leadscrew nuts. The following dimensions were used (click to enlarge):
 |
| Delrin Nut Dimenions |
 |
| Delrin Nut 3D Model |
The original design had 2 motors on the x-axis. Budget cutbacks reduced the number of motors to 1 using a belt drive to synch the left and right leadscrews. While not considered ideal by professional builders, the accuracy of machined parts achieved with parts made using the final router easily met specifications. However,the use of 2 motors is recommended to achieve maximum torque and speed on the X-axis. Remember that the X-axis drives the full weight of the gantry around so having 2 motors is advantageous and eliminates any concerns, real or imagined, regarding belt slippage or stretch.
 |
| X-Axis front end plate mounted |
X-Axis
To be continued....


